Creating an organisation
Utilising an organisation with JoyDX allows you to collaborate in a simple manner and is the recommended way to use JoyDX if operating in a team. Organisations are simple to create, this section of the guide will demonstrate how to setup an organisation using the convenient design interface built in.
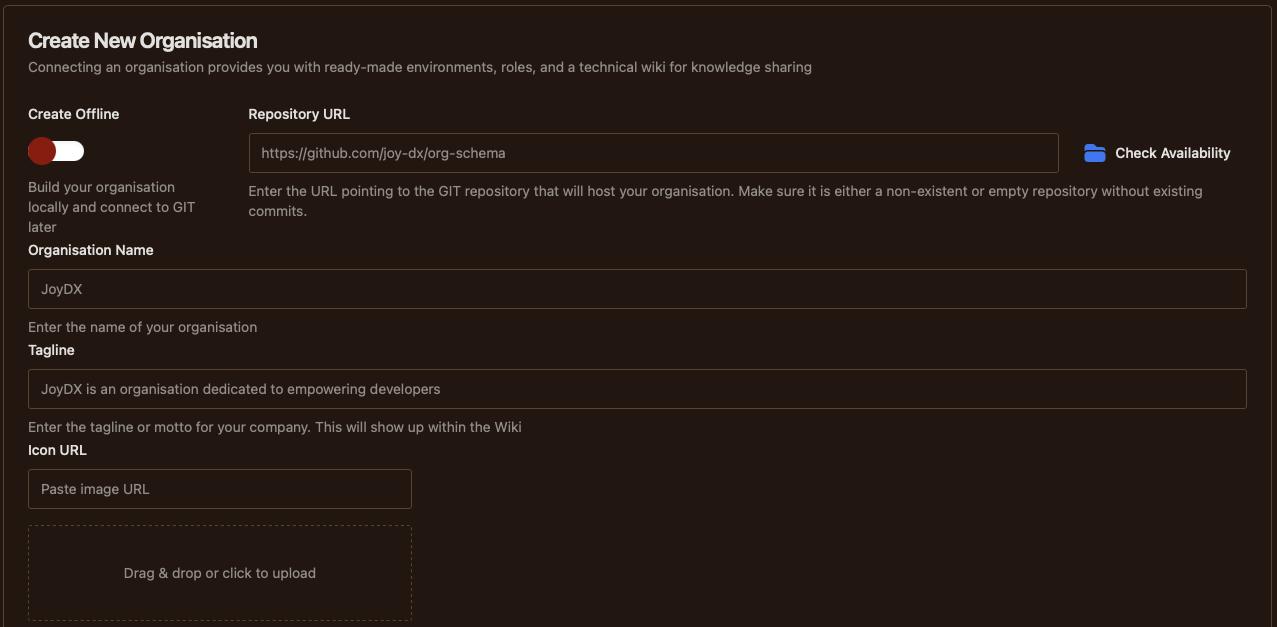
- Create OfflineManage your organisation on-device without connecting to a VCS account. If you select this option, you can later connect to a remote repository from the organisation screen
- Repository URLEnter address for either an existing empty repository or a non-existent repository to be created
- Check / Create RepositoryClick the "Check Availability" button. If repository is non-existent, a new "Create Repository" button should be displayed next to the check button. A green tick will be displayed when OK
- Organisation NameEnter the name for your company
- TaglineA one liner used as an introductory message to your company / unit. It will mainly be used within company wiki
- IconEither enter a URL to an image asset or select an image for upload. Entering URL will download the image and cause it to be included within the organisation repository
Once the base organisation has been setup, the basic meta information will be pushed to the remote GIT repository and you will be recommended to create your first role and environment.
- First RoleSee Define a Role for more information
- First EnvironmentSee Create an Environment for more information
